The NOC CDN requires your domain to be using the NOC Auth-DNS service to work. Please configure your domain to use the NOC Auth-DNS before proceeding.
Step 1: Activate CDN
Assuming the Auth-DNS for the domain is pointed to NOC, click on the CDN Dashboard in your dashboard.
The system will notify you of all domains that can be activated.

Simply click Activate CDN on the domain you want to activate.
Step 2: Set CDN Options
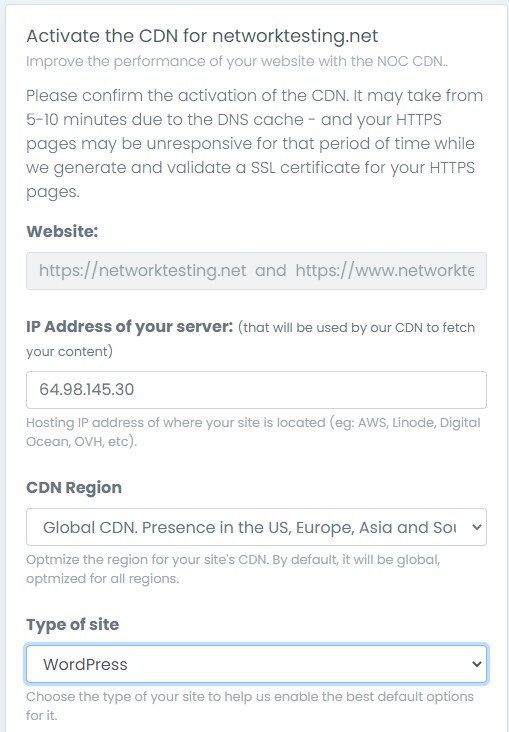
There are three key settings required to activate the CDN:
| Setting | Description |
|---|---|
| Origin IP | This is the IP address of your server, this is where the CDN will route traffic and where it will pull the latest content. |
| CDN Region | You have the ability to configure your sites performance according to the regions that are most important to you. For now, there are three options – US, Europe and Global. |
| Type of Site | Defining the type of site will become really important in future iterations that create profiles for each platform type. |
The interface looks something like this:

Once you ENABLE, you will be created with the following message:
CDN enabled. Please wait for 5-10 minutes for the DNS cache to clear and your traffic to be redirected to our CDN. Note that while we generate a SSL certificate, your HTTPS pages may show an error for a few minutes.
