Surges in traffic can strain your applications and infrastructure, resulting in sluggish performance or even downtime.
With NOC’s Waiting Room, organizations can seamlessly manage traffic spikes by directing overflow users to a custom-branded waiting area. This not only maintains a smooth customer experience but also prevents your origin servers from becoming overloaded with requests.
Configure Waiting Room with NOC
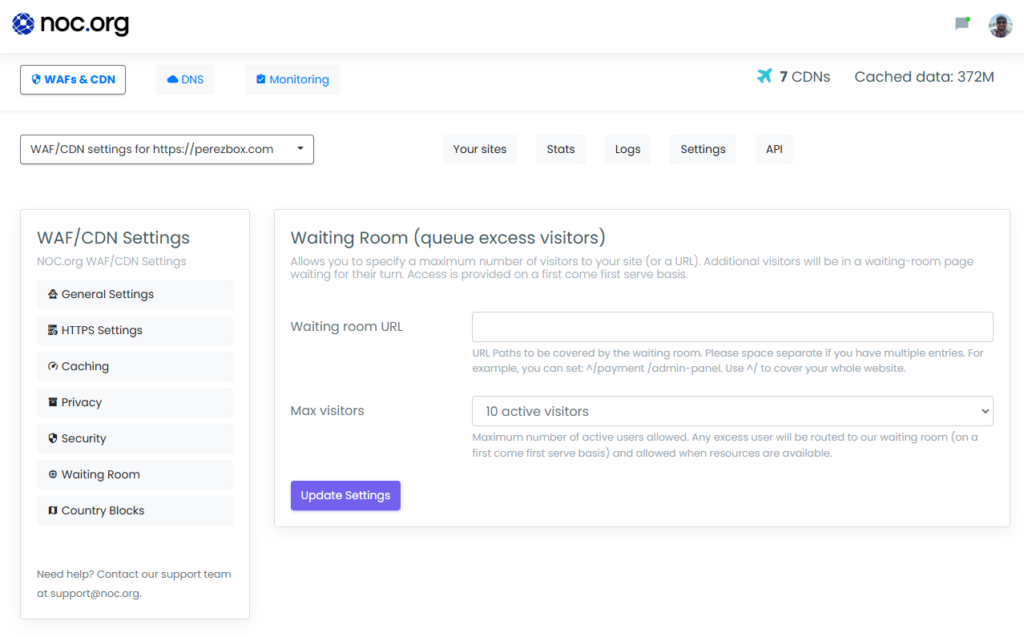
The Waiting Room feature is accessed via the Settings option in your NOC dashboard.
1. Select your Domain, and click Settings.
2. In the navigation pane, select “Waiting Room“

3. Select the URL path you want to be effected by the waiting room feature. You can cover the entire site by using ^/ or specify a specific url by adding the path (e.g., /admin-panel).
4. Select from the list of total users allowed.
5. Update Settings
The Value of a Waiting Room Feature
Imagine an e-commerce website running a highly anticipated flash sale or launching a limited-edition product. As soon as the sale goes live, thousands of customers flood the site within seconds, all eager to make a purchase.
Without a traffic management system in place, the sudden spike in visitors could overwhelm the server, causing slow load times or even a complete site crash. This not only frustrates customers but also results in lost revenue and damages the brand’s reputation.
By using a Waiting Room feature, the website can manage this surge smoothly:
- Controlled Access: The waiting room places excess visitors in a queue and allows them to enter the site in manageable waves.
- Enhanced User Experience: While waiting, users see a custom-branded page with updates on their position in line, estimated wait times, and promotional content, keeping them engaged.
- Server Protection: The waiting room ensures that only a limited number of users access the site at a time, preserving server resources and maintaining optimal performance.
