
To start using NOC you will need to sign up with an email that can be verified. All emails must be verified before your account is activated.
After verifying your email, you can proceed with using the service by logging into the platform.
Note: To do this you need to log into your registrar. If you don’t know your registrar, please see this guide – Finding a Domains Registrar
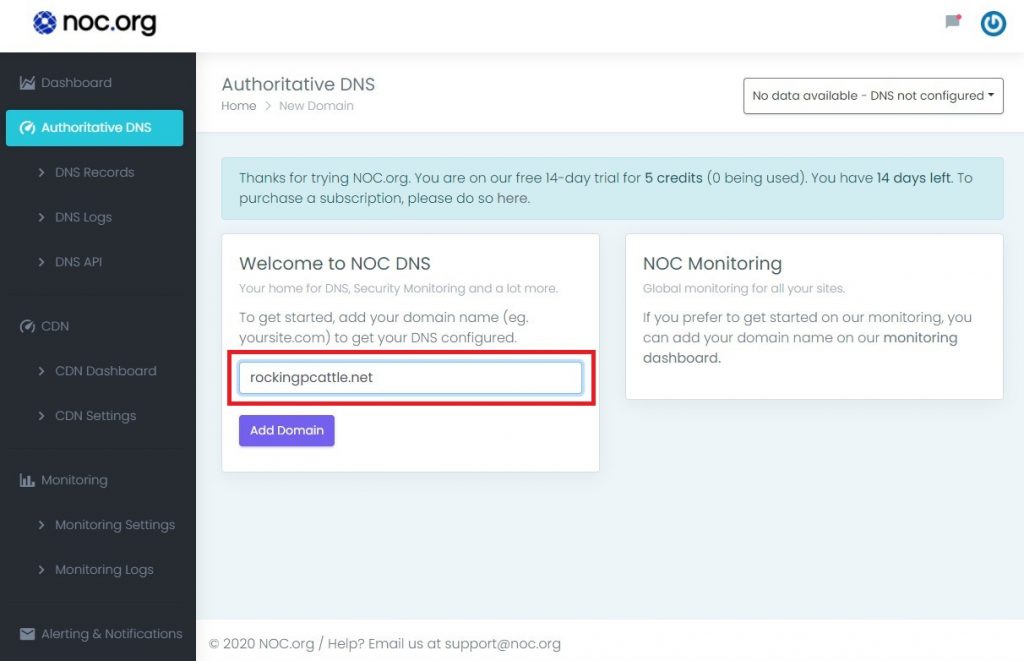
Step 1: Add a domain
Before you can do anything, you have to add a domain to your account. You will be presented with a simple wizard that asks you for the domain when you first log in.
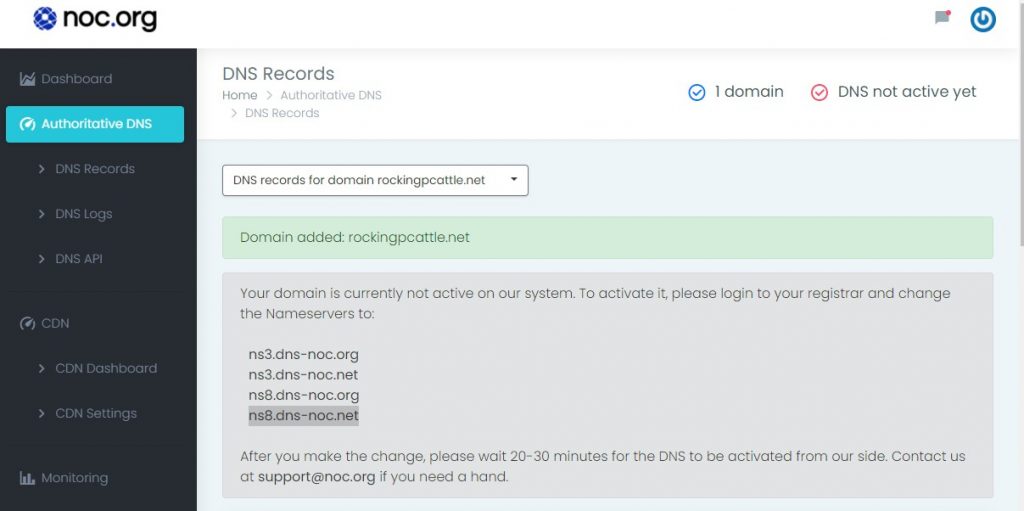
Step 2: Update Nameservers with Registrar
The next step is to update the nameserver values with your registrar. The system will automatically generate the nameserver values you require.
For example, it will look like this in your dashboard:
Update the nameserver values in your registrar like this (e.g., NameCheap):

This can take 20 – 30 minutes to take affect, dependent on your Registrar and their update systems.
That’s it, once the nameserver values are updated with your registrar you can begin using the NOC.org features for your Authoritative DNS needs.
Change Nameserver on Most Popular Registrars
Here are some guides to help with some of the better known registrars: