Of all the ways a server is compromised, the access vertical continues to be the #1 vector. Whether it is through brute forcing attacks that guesses a users weak password, or credentials (i.e., username and password) being leaked via another compromise. Bad actors take advantage of this vector and it is why we see automated attacks against new servers within minutes of the server going live. It is also why we want to spend a bit more time focusing on SSH.
This article does skip over a few basic principles around securing a web server (e.g., don’t use FTP) and assumes we’re already on the same page with regards to connecting via Secure Shell (SSH).
Common SSH Hardening Tips
There are some well documented fundamentals on how to harden SSH via the daemons configuration file:
| # | Description |
|---|---|
| 1 | Don’t allow SSH Authentication with passwords; |
| 2 | Don’t allow Root to login; |
| 3 | Disable authentication mechanisms not being used; |
| 4 | Disables services you don’t need (e.g., X11Forwarding, User Environment, Tunneling, Forwarding); |
We dive into each one in a bit more detail in the guide below:
Uncommon Tip: Employ a Whitelist Model
In addition to the traditional tips you find online, we find one of the most practical, and effective, security controls is to employ a whitelist model on your on your SSH.
Employing a whitelist model is the process of creating an allow-list for your server. In other words, explicitly identifying who is, and who is not allowed to access the web server and blocking everyone else. In the world of security it is much more efficient to create allow-lists than to create blacklists. It is easier because usually the “allow-list” is much smaller and easier to manage than “block-lists” that can change every minute, hour, or day.
The biggest rebuttal, however, comes from a remote work environment where IPs can be dynamic as the user moves between networks.
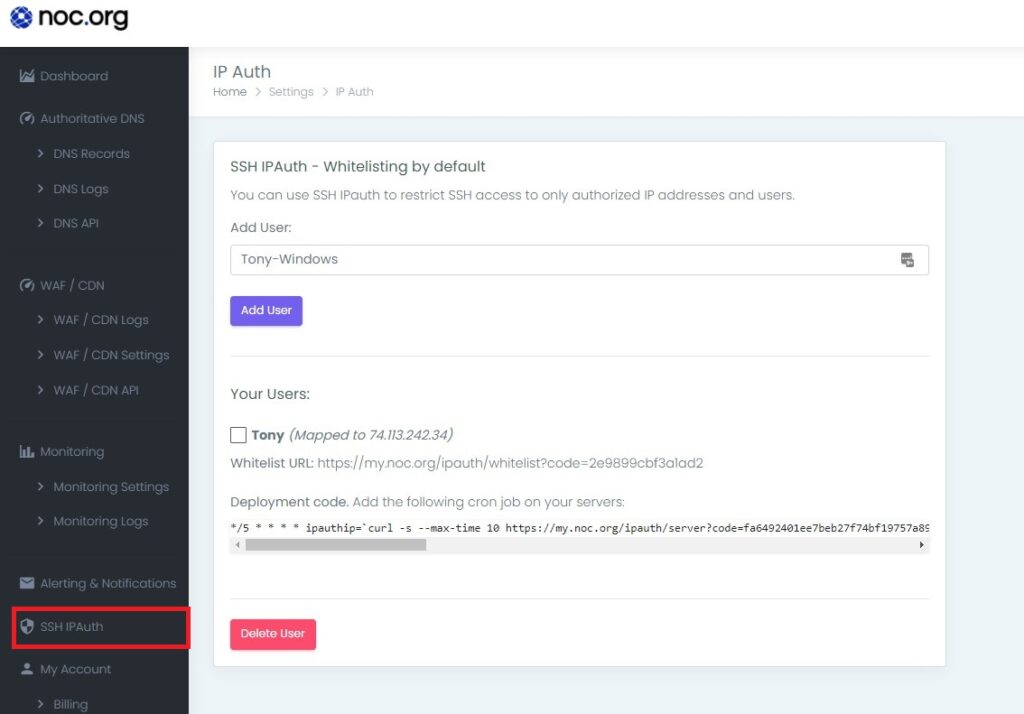
To help with this, we have create an IPAuth ssh authentication module. This module creates a key pair that can be used to authenticate your location with your web server. We have a Free option, and one that is included in your NOC account.

Whether using the Free, or the paid option, the system works the same. It creates two bits of critical information that will be used to keep your client and server in sync.
| Part | Explanation |
|---|---|
| authentication URL | This is used to dynamically capture your local IP. Please bookmark this link. |
| server Key URL | This is used to dynamically pull the new local IP. |
The server Key URL is deployed to the server, and the authentication URL locally on your device. You can create a local cron job to check the authentication URL every minute, or every hour, and when it does it updates your server accordingly.
Of all the different controls available to hardening SSH, creating an allow-list has proven to be the most effective solution to keeping bad actors out. The link below provides more technical details on how to use IPAuth.
