Log in to your GoDaddy Domain Control Center.
Select your domain to access the Domain Settings page.
Under Additional Settings, select Manage DNS.

In the Nameservers section, select Change.
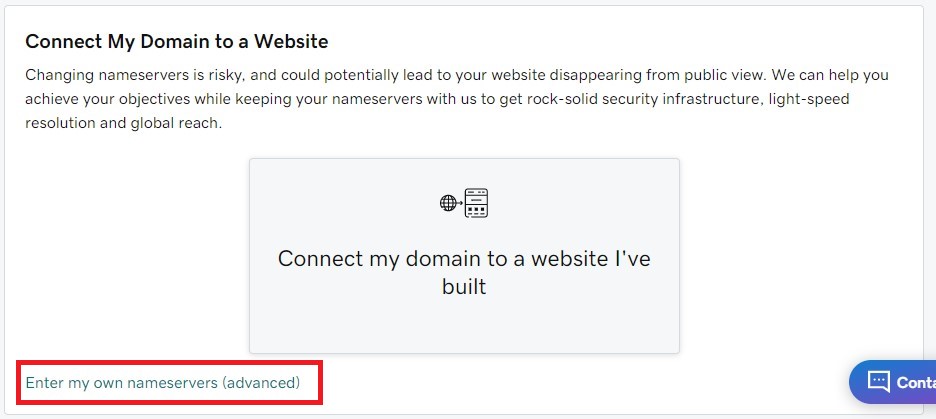
In the Connect My Domain to a Website dialog, click the “enter my own nameservers (advanced)” link:

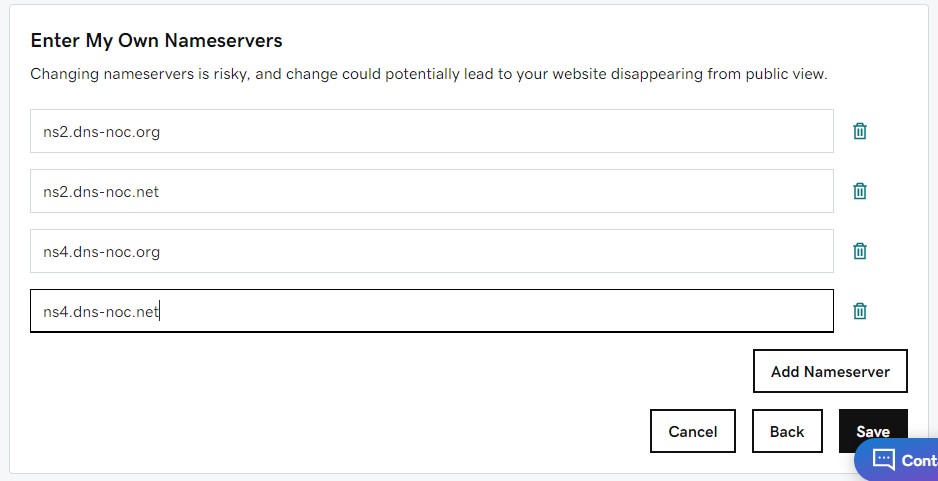
Enter the nameserver values provided in your NOC.org settings page (guide on how to use Auth-DNS):

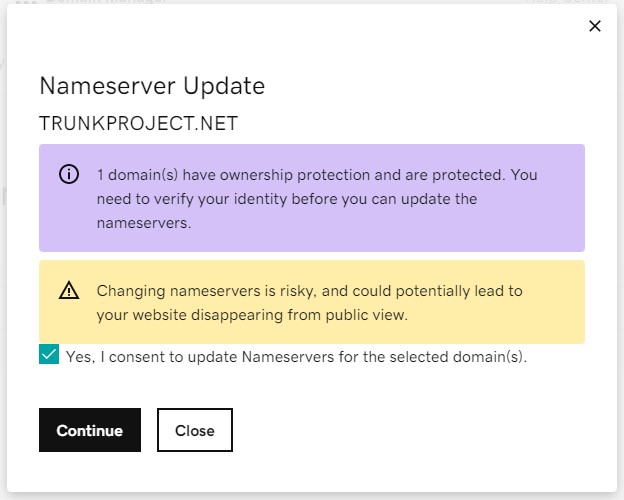
Click save, and be sure to consent to the change in the following page:

Things are looking up if you see this message:

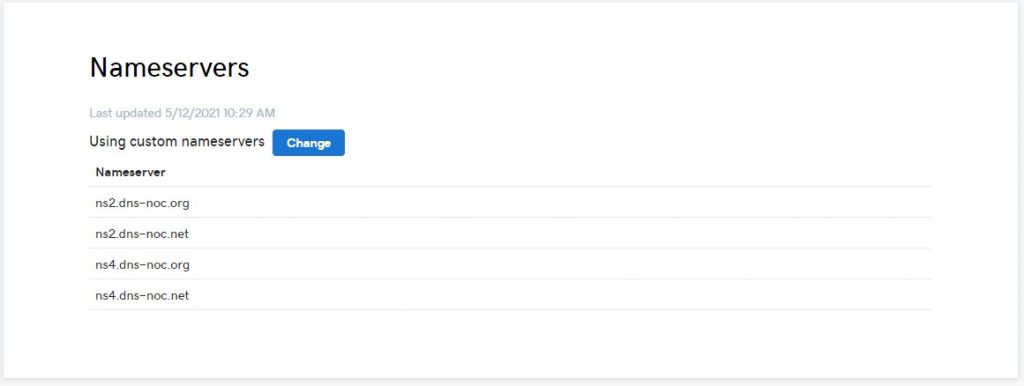
Once the servers update, about 5 – 15 minutes, you should see the new nameservers reflected on the page:

